Monday, July 30, 2012

Pics of things changing this month on Oak

 I used painter's drop cloths to make my "linen" curtains and found the rods on big time sale at a fire-sale store! The pic below left is the living room and below right is dinning room which is on the front of the house.They will for sure look better when I paint the walls! Depending on the furniture and walls I might add some ribbon border or something on the curtains, we will see.


 I LOVE the fabric on these chairs, my sweet Gran helped me pick out the fabric when I visited her a few weeks ago, but am NOT liking it with the black chairs and brownish table top table top! I will paint them - gray maybe?


 Below the picture of our dog are three pieces of bedroom furniture i redid. I put up before and after pics so you can get the idea... The first piece is an old sewing table that I got for a few bucks at a flea market, the other dresser was given to us by family and I painted it the same so the pieces would work together! Next I will find cute bedding and paint the walls a pale green and the furniture will stand out a little more than now with the YELLOW walls. The YELLOW is haunting me in my dreams!


That is all for now! I will post more pics as I complete projects around the house.
Thanks for looking ;)

Wednesday, July 25, 2012

Bathroom Cabinet Redo... in progress

I had a break from the painting of the kitchen cabinets and decided it was time to tackle the bathroom cabinets. I read a tutorial on www.monicalikesit.com and decided to go with staining the cabinets dark to avoid painting the whole house tones of white. When we bought the house a few supplies were left in the garage so I decided to use those instead of using the products recommended by Monica. I did however follow her directions for the process.

First I removed the doors and all the hardware. Then I sanded the cabinets a little in the garage. I used a sanding block to rough up the frames still attached to the wall.This before picture is bad lighting and makes the before appear darker than it actually was. The second photo is after sanding.


 Let the fun/anxiety attack begin! I put a glove on my hand so it didn't get stain all over me and then covered the glove with one of my husbands old white socks. We had some gel stain left in the garage in a dark color, I dipped in and got busy! This is when the anxiety attack stared. It is streaky! I mean really streaky! I told my self I would do one more coat when it dried and go from there. After drying for 24 hours I did the second coat. It began looking better and I let this coat dry for another 24 hours. By the third coat of stain I was glad I chose to do this project. I let the third coat dry for about 5 days while I was out of town. Then began on the top poly coats. Again, I found some water based poly left in the garage. I got a sponge brush and did two coats of poly, allowing for 24 hours of drying time in between, making sure I went slow to avoid bubbling.


ALL DONE!!!

Saturday, July 7, 2012

Kitchen Cabinet Transformation

My first project were these terrible light oak kitchen cabinets (they were worst in person!). There was white paint left in the garage so white it was. First step: I took all the doors and drawers off and took all the hardware off. Second step: sanded the cabinets down with my small orbital sander. I didn't take it all the way down to the wood but just enough to break down the shiny coat (this was a mistake! I should have spent more time sanding and making sure I got in every nook and cranny!). Next I took a piece of sand paper and and sanded down the frames that were still attached in the kitchen. The dust was EVERYWHERE. It was so impossible to clean it all up. I wiped and vacuumed for days! After the sanding mess was cleaned up it was time to paint!!!

I got a Kilz 2 primer and painted that on doors (both sides), drawers, and frames. I also Painted the inside shelves of our cabinets because I think it will help lighten it up in there when I am hunting dishes.

 When this dried I cam back with the white paint left in our garage it was ACE Brand trim paint in semi-gloss. I did two more coats once this dries. Oh! I used a sponge roller so there wouldn't be any brush marks. They make sponge rollers in small (4 inch to 6 inch) sizes just for cabinets and trim, they worked great! I also got a few sponge brushes for all the insets that the rollers would not get in. Here are some before, during, and after. All the sanding and painting took me about two weeks, there were days I did nothing because I was sooo sick of painting and of course each coat takes some drying time.

 I got plain brushed nickel pulls and hinges from Lowe's. I thought about spray painting the old ones but decided it just wasn't worth the money savings. Some nights I lay in bed wishing I had used rubbed bronze pulls but it is done now!


I will be painting the walls but have not chosen a color yet. I am leaning toward greens. But for now I am taking a break from painting!
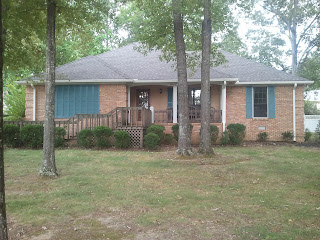
Hey Y'all! I'm not sure how this is going to go yet but I thought I would share some of my trial and errors of updating and decorating our first home. My husband, blue heeler, and cat are settling into a new town and a new house, these are stories from the adventure...